Correctly Setting Up Google Analytics in WordPress
Setting up Google Analytics on a WordPress site is easy but care has to be taken to do it correctly.
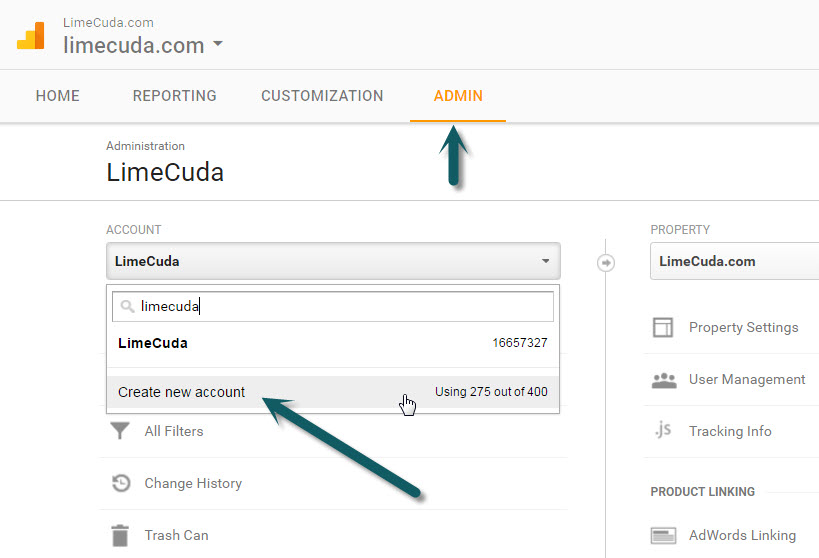
1. Create the Account in Google Analytics
Go to https://analytics.google.com/analytics/web/
Create a new account.

When filling in the details pay special attention to whether your site is http or https and if you are using www or non-www.
There is a big difference between https://limecuda.com and http://www.limecuda.com or any of the other combinations. Be consistent!
2. Create a Google Search Console Account
Technically this is a separate Google tool but it is such a key one and really should be created AND linked to the Google Analytics account so they share data.
Go to https://www.google.com/webmasters/tools/ and add the EXACT URL
e.g. https or http and www or non-www


If you have another user that should be on this Search Console account you can add them as a Verified User at this time.
3. Configure Google Analytics
In the admin PROPERTY Section
- Make sure “Use enhanced link attribution” is ON. This gives more accurate click reports.
- At this point click “Adjust Search Console” follow the instructions and link to the EXACT matching Search Console account you previously created.


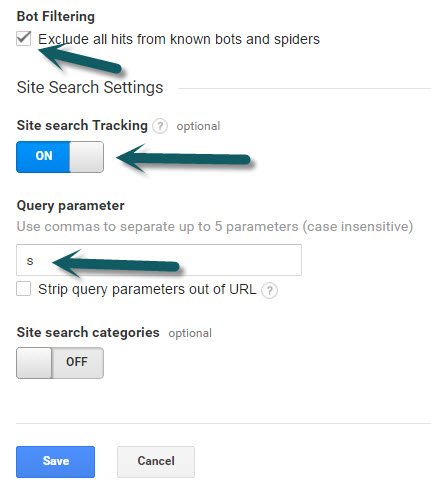
In the admin VIEW Section
- Check the box to exclude known bots – this gives cleaner reports
- Enable on-site search tracking and put the “s” search parameter for WordPress

4. Install a Google Analytics Plugin on WordPress
We prefer to use a plugin to handle the GA script being added to the site rather than pasting the full code in somewhere. Why?
- Easier to keep the site properly configured over time as GA advances
- A plugin is more persistent and tracking won’t get lost if the theme is ever switched
- A plugin can more easily provide advanced features for the GA setup
Our preferred plugin is Google Analytics by MonsterInsights
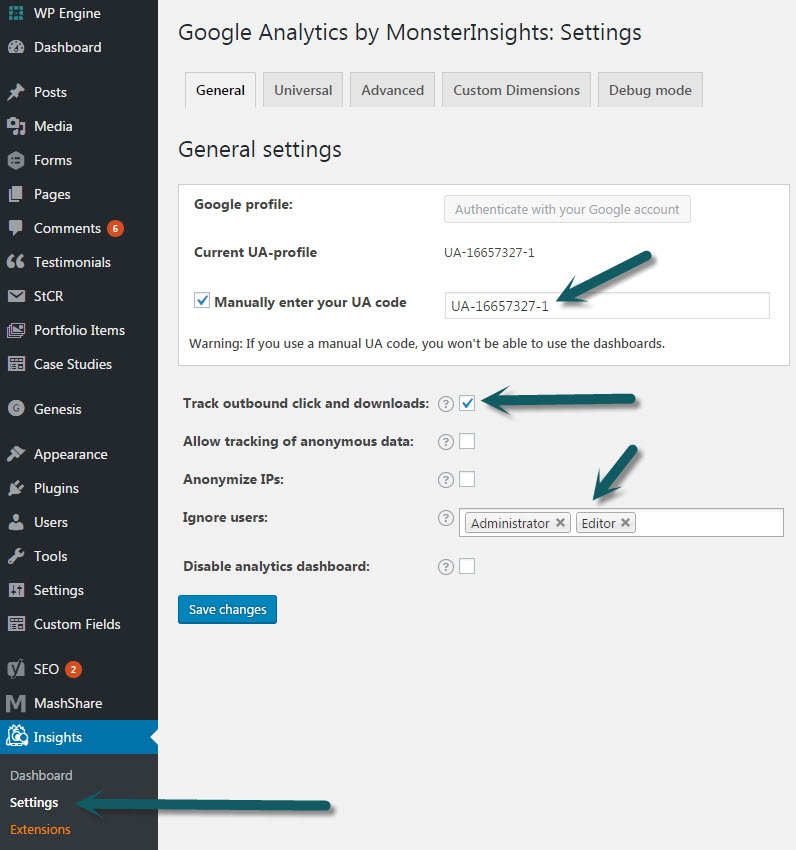
5. Configure the Google Analytics Plugin
In the Google Analytics PROPERTY section copy the Tracking ID, it should look something like: UA-16657327-1
Paste this into the right location in your plugin or “Authenticate with Google”
Note: we exclude certain user levels from tracking as well as tracking outbound clicks.

On the “Universal” tab make sure “Enable Universal tracking” and “Enhanced Link Attribution” are checked.


Misc.
- Add any other users to have Google Analytics account access – must be a Google Account email address. Gmail or “G Suite” emails work but you can also make a non-Google email a Google Account.
- If the DNS is running through CloudFlare you can have it add the code on every page (Do NOT use at same time as a plugin adding the code or you will have bounce rate reporting issues)
- Add an annotation if this is an existing Google Analytics account